Thursday, 21 November 2024
Create a Pallet Shed DIY for Your Backyard with Simple Plans

Constructing a Durable Pallet Shed for Your Backyard: A Comprehensive DIY Guide
This comprehensive guide provides detailed instructions for constructing a functional and aesthetically pleasing pallet shed in your backyard. The project utilizes reclaimed shipping pallets, offering a cost-effective and environmentally conscious approach to outdoor storage. While requiring some basic carpentry skills, the design prioritizes simplicity and clarity, making it accessible to DIY enthusiasts of varying experience levels.
I. Planning and Preparation: Laying the Foundation for Success
Before embarking on the construction, meticulous planning is crucial. This phase involves determining the shed's dimensions, selecting appropriate materials, and preparing the site. Careful consideration of these factors will directly impact the final product’s stability, longevity, and aesthetic appeal.
A. Determining Shed Dimensions and Design
The dimensions of your pallet shed should be dictated by your storage needs and the available space in your backyard. Consider the items you intend to store and ensure the shed provides ample room. A typical small pallet shed might measure 6ft x 4ft x 6ft (length x width x height), but this can be adjusted based on your requirements. Simple rectangular designs are easiest to construct for beginners. Sketch a basic plan to visualize the structure before proceeding.
B. Material Selection and Acquisition
The cornerstone of this project is the reclaimed shipping pallets. Source your pallets responsibly, ensuring they are treated and free from harmful chemicals or pests. Inspect each pallet carefully for rot, damage, or loose boards before incorporating them into the structure. Supplementing with new lumber might be necessary for structural elements or reinforcing weak areas. You will also need:
- Pressure-treated lumber for the base frame (depending on ground conditions)
- Concrete blocks or a suitable foundation material
- Screws (exterior-grade, galvanized)
- Hammer or nail gun
- Measuring tape, level, saw
- Safety glasses and work gloves
- Optional: Roofing materials (tar paper, corrugated metal, or shingles), paint or sealant
C. Site Preparation
Choose a level, well-drained location in your backyard. Clear the area of vegetation, debris, and any obstacles. Mark out the designated footprint of your shed using string or stakes. If the ground is uneven, leveling the area is essential for structural integrity. Consider using a compacted gravel base or a concrete slab for a more stable foundation, particularly in areas prone to moisture.
II. Construction: Assembling the Pallet Shed
This phase involves the actual construction of the shed, starting with the base and progressing to the walls, roof, and finishing touches. Accurate measurements and careful assembly are vital for a robust and aesthetically pleasing structure.
A. Building the Base Frame
Construct a sturdy base frame using pressure-treated lumber, ensuring it's level and matches the dimensions of your planned shed. This frame will provide a stable foundation for the pallet walls. Securely fasten the frame members using screws and ensure that they are perfectly square and aligned. This will be crucial for a square and stable structure. The frame should sit directly on your prepared base (concrete, gravel, or compacted earth).
B. Erecting the Pallet Walls
Begin assembling the pallet walls. Position the pallets vertically and secure them to the base frame using screws. Ensure that the pallets are closely fitted to avoid gaps, and use additional lumber to reinforce any weak points. You might need to cut and adjust some pallets to ensure a snug fit. For increased stability, consider adding vertical supports between the pallets.
C. Constructing the Roof
The roof design depends on your preferences and skills. A simple gable roof is recommended for beginners. You can use additional lumber to create a roof frame, supporting the roofing material. Attach the roofing material (corrugated metal, shingles, or tar paper) securely to the frame. Ensure proper overlapping to prevent water leakage.
D. Adding Finishing Touches
Once the basic structure is complete, consider adding finishing touches to enhance both the aesthetics and functionality of the shed. These additions could include a door (constructed from pallets or new lumber), a simple latch, and a ventilation system to prevent moisture buildup. Consider painting or sealing the pallets for protection from the elements and a more polished look.
III. Safety Precautions and Considerations
Safety should be a paramount concern throughout the construction process. Always wear appropriate safety gear, including safety glasses and work gloves. Use caution when handling power tools and follow all manufacturer's instructions carefully. Ensure proper ventilation if working with paints or sealants. Inspect the structure regularly for any signs of deterioration and address any issues promptly to maintain its safety and longevity.
IV. Maintenance and Longevity
Regular maintenance is key to extending the life of your pallet shed. Inspect the structure periodically for any signs of damage, rot, or pest infestation. Address any issues promptly to prevent more extensive repairs. Consider applying a fresh coat of paint or sealant every few years to protect the pallets from the elements and to enhance their appearance.
By following these detailed instructions and prioritizing safety, you can successfully construct a durable and functional pallet shed for your backyard, providing valuable additional storage space and adding a unique element to your outdoor landscape. Remember to adapt the design and materials based on your specific needs and available resources. Enjoy the process of building your own backyard storage solution!

Free Pallet Shed Plans PDF: Your Guide to a Sustainable Outdoor Shed
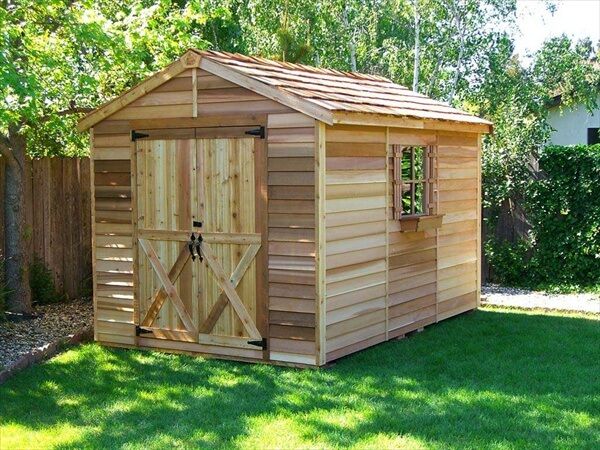
Free Pallet Shed Plans PDF: Your Guide to a Sustainable Outdoor Shed
Hey there, fellow DIY enthusiasts! So you're dreaming of a new shed, but the price tags at the home improvement store are making your eyes water? I get it. Building your own shed can be incredibly rewarding, and it doesn't have to break the bank. In fact, you can build a surprisingly sturdy and attractive shed using reclaimed pallets! That’s right â€" those often-overlooked wooden pallets can be transformed into a functional and stylish addition to your backyard. This guide will walk you through everything you need to know to build your very own pallet shed, completely free, using easily accessible plans.Why Choose a Pallet Shed?
Before we dive into the nitty-gritty of building, let's talk about why pallet sheds are such a fantastic option. Firstly, they're incredibly sustainable. Repurposing pallets keeps them out of landfills and reduces the demand for newly harvested lumber. It’s a win-win for your wallet and the environment!
Secondly, they're often surprisingly affordable. You might even be able to source pallets for free from local businesses (always ask permission first!). This dramatically cuts down on material costs, making this project incredibly budget-friendly.
Thirdly, with a little creativity, a pallet shed can be surprisingly attractive. The rustic, reclaimed look adds a unique charm to any garden. You can personalize it with paint, stain, or even decorative elements to truly make it your own.
Finally, building a pallet shed is a fantastic way to learn new skills. Whether you're a seasoned DIYer or a complete beginner, this project will challenge and reward you in equal measure.
Getting Started: Sourcing Your Pallets
The first step, and arguably the most important, is finding your pallets. Here are a few tips:
- Check with local businesses: Grocery stores, hardware stores, and construction companies often have pallets they're willing to give away. Just be sure to ask politely and make sure it's okay to take them.
- Browse online classifieds: Websites and apps like Craigslist or Facebook Marketplace often have free or cheap pallets available.
- Inspect carefully: Before you haul away a pile of pallets, inspect them thoroughly. Look for any signs of rot, damage, or pest infestation. You want strong, sturdy pallets for your shed's foundation.
- Consider the size and type: Think about the size of the shed you want to build and choose pallets that will work well for your design. Some pallets are better quality than others.
Download Your Free Pallet Shed Plans PDF
Now for the exciting part! While I can't physically provide a PDF here, I can give you a conceptual overview of what a good set of plans should include. Imagine a PDF that provides detailed diagrams and instructions for each step of the process. This might include:
- Materials list: A comprehensive list of all the materials you'll need, including the number of pallets, screws, nails, and any additional lumber or hardware.
- Detailed diagrams: Clear, easy-to-understand diagrams showing the construction process, from the foundation to the roof.
- Step-by-step instructions: A clear, concise guide walking you through each step of the process, with accompanying photos or illustrations if possible.
- Tips and tricks: Helpful hints and advice to make the building process smoother and easier. Think about things like securing the pallets together or adding extra support for the roof.
- Optional features: Suggestions for adding extra features to your shed, like shelves, doors, windows, or a lock.
Remember to search online for "free pallet shed plans PDF" to find a design that suits your needs and skill level. Many websites and blogs offer free downloadable plans. Make sure to carefully review and understand the plans before you begin building.
Essential Tools and Materials
Even with free pallet wood, you’ll need some essential tools and materials. Don’t worry, you probably have some of these already!
- Measuring tape and level: Essential for accurate measurements and ensuring your shed is square.
- Hammer or nail gun: For securing the pallets together.
- Screwdriver or drill: For driving screws, which are generally stronger than nails for this type of construction.
- Safety glasses and gloves: Always prioritize safety!
- Saw (circular saw or hand saw): To cut pallets to size if necessary.
- Optional: Power sander, paint, stain, roofing materials (tar paper, shingles, etc.), hinges, door handle, and any other desired add-ons.
Building Your Pallet Shed: A Step-by-Step (Conceptual) Guide
While specific steps will vary depending on your chosen plans, here's a general overview:
- Prepare the ground: Level the area where you plan to build your shed and consider adding a gravel base for drainage.
- Assemble the base: This might involve using additional lumber to create a strong foundation for your pallet walls.
- Construct the walls: Carefully secure your pallets together, ensuring they are level and aligned. You may need to cut or modify some pallets to fit.
- Add the roof: This is often the most challenging part, requiring careful planning and construction. You’ll need to create a frame and then cover it with roofing material.
- Install doors and windows (optional): Add your chosen doors and windows, securing them firmly to the frame.
- Finish and decorate: Once the structure is complete, you can paint, stain, or add any decorative elements you like.
Commonly Asked Questions
Q: Are all pallets safe to use?
A: No. Some pallets are treated with chemicals that might be harmful. Look for heat-treated pallets (HT) which are generally safer. Avoid pallets marked with MB (methyl bromide), which is a pesticide.
Q: How long will a pallet shed last?
A: The lifespan depends on the quality of the pallets, the weather conditions, and the level of protection you provide (paint, sealant, etc.). With proper care, you can expect several years of use.
Q: Can I add electricity to my pallet shed?
A: Yes, but it's crucial to consult with a qualified electrician to ensure the wiring is safe and complies with building codes.
Q: What if I don’t have much DIY experience?
A: Start with a simple design and don't be afraid to ask for help. There are plenty of online resources and tutorials available to guide you. Take your time and enjoy the process!
Building a pallet shed is a fantastic project that combines sustainability, affordability, and the satisfaction of creating something with your own hands. Remember to research, plan, and prioritize safety. Happy building!
Step-by-Step Guide to Building a Pallet Shed DIY on a Budget
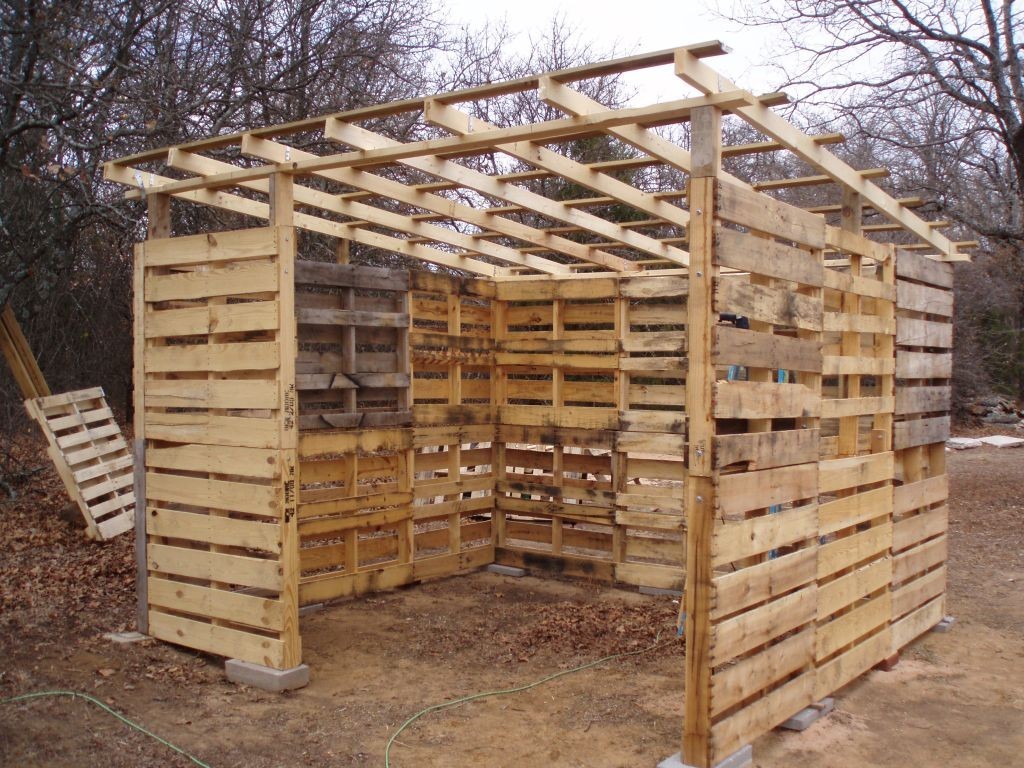
Constructing a Budget-Friendly Pallet Shed: A Comprehensive DIY Guide
This guide provides a detailed, step-by-step approach to building a cost-effective pallet shed, suitable for individuals with moderate DIY skills. The emphasis is on maximizing resource utilization and minimizing expenditure while maintaining structural integrity and weather resistance. This project requires careful planning and execution; safety precautions should be prioritized throughout.
Phase 1: Planning and Material Acquisition
Before commencing construction, thorough planning is paramount. This phase involves determining the shed's dimensions, location, and material sourcing.
1.1 Defining Shed Specifications
The first step is to determine the required dimensions of your pallet shed. Consider the intended use and the available space. A detailed sketch, including measurements for length, width, and height, is crucial for accurate material estimation and construction. Also, consider the desired features, such as a door, windows, and a roof overhang for additional weather protection. Ensure adherence to local building codes and regulations throughout the design process.
1.2 Sourcing Recycled Pallets
The foundation of this project lies in acquiring free or inexpensive pallets. Several avenues exist for sourcing these materials:
- Local Businesses: Contact nearby businesses, such as supermarkets, warehouses, and construction sites. Many are happy to dispose of used pallets for free or a nominal fee.
- Online Classifieds: Websites and apps dedicated to classified advertisements often feature free or inexpensive pallets.
- Recycling Centers: Some recycling centers may offer pallets for a small fee or even for free.
1.3 Gathering Additional Materials
While pallets form the primary structure, additional materials are required for a complete and weather-resistant shed. This includes:
- Concrete Blocks or Foundation: A solid foundation is essential for stability. Concrete blocks provide a cost-effective and durable solution. Alternatively, a compacted gravel base can suffice for less demanding applications.
- Roofing Material: Select a budget-friendly yet weather-resistant option, such as tarpaulin, corrugated metal sheeting, or recycled roofing felt. Consider the climate and local weather conditions when making this choice.
- Fasteners: Galvanized nails, screws, and appropriate connectors are required to secure the pallets and other components. The choice of fastener depends on the type of wood used in the pallets. Consider using exterior-grade fasteners for increased durability.
- Wood Treatment: A wood preservative or sealant helps protect the pallets from rot, decay, and insect infestation. Ensure compliance with environmental regulations when selecting and applying wood treatment.
- Door and Window Materials (Optional): If incorporating a door and/or windows, acquire the necessary materials, such as wood planks, hinges, and window panes. Consider repurposing existing materials to further reduce costs.
Phase 2: Construction
This phase details the assembly of the pallet shed. Safety measures such as wearing appropriate protective gear (safety glasses, gloves, work boots) are essential throughout the construction process.
2.1 Foundation Preparation
Begin by preparing a level foundation. For a concrete block foundation, lay the blocks to the desired dimensions, ensuring a level and stable base. For a gravel base, compact the gravel thoroughly to provide a stable surface for the pallets.
2.2 Pallet Assembly
Carefully assemble the pallets to form the shed’s walls. Ensure the pallets are firmly connected using appropriate fasteners. For added stability, consider using additional bracing or supports between pallets. Plan the placement of doors and windows at this stage to avoid potential conflicts with pallet configuration.
2.3 Wall Construction and Securing
Begin by erecting the walls using the assembled pallets. Secure the pallets to the foundation using concrete screws or other appropriate fasteners. Ensure vertical alignment and plumbness. Once the walls are in place, reinforce the corners by using additional bracing or by interlacing the corner pallets.
2.4 Door and Window Installation (Optional)
If including a door and windows, install these according to your chosen design. Ensure a secure fit and weatherproofing around the frames to prevent drafts and leaks. Use appropriate hinges and locking mechanisms.
2.5 Roof Construction
The roof design depends on the desired aesthetic and structural considerations. A simple gable roof is relatively easy to construct and provides adequate weather protection. Attach the roofing material securely, ensuring proper overlap and waterproofing. Consider adding flashing around the edges of the roof for additional weather protection.
Phase 3: Finishing Touches and Maintenance
The final phase involves adding finishing touches and implementing a maintenance plan to ensure the longevity of the shed.
3.1 Weatherproofing
Apply a wood preservative or sealant to all exposed wooden surfaces to protect against moisture damage and insect infestation. Ensure complete coverage for maximum protection. Seal any gaps or cracks in the walls and roof to prevent air leaks and water ingress.
3.2 Interior Finishing (Optional)
Consider adding an interior finish, such as paint or plywood sheeting, to improve aesthetics and enhance insulation. Ensure good ventilation to prevent moisture buildup inside the shed.
3.3 Ongoing Maintenance
Regular inspection and maintenance are crucial for the longevity of your pallet shed. Check for any signs of damage or deterioration, and address any issues promptly. Re-apply sealant or wood preservative as needed to maintain protection against the elements.
By following this comprehensive guide, you can successfully construct a functional and cost-effective pallet shed. Remember that careful planning, attention to detail, and adherence to safety practices are essential for a successful outcome. This project offers a sustainable and budget-conscious approach to building a practical storage solution.
How to Build a Pallet Shed: Download Your Free PDF Plans Now

Build Your Dream Pallet Shed: Free Plans Inside!
Hey there, fellow DIY enthusiasts! Are you dreaming of a beautiful, functional shed, but the price tags at your local home improvement store are giving you sticker shock? Well, grab your coffee (or tea!), because I'm about to let you in on a fantastic secret: you can build an amazing shed using reclaimed pallets â€" and it won't break the bank! I’m talking a super-stylish, surprisingly sturdy shed that’s perfect for storing tools, gardening supplies, or even just creating a cozy little retreat in your backyard. And the best part? You can download your free PDF plans right now! (Just scroll down a bit further â€" I promise, it's worth it!).Why Choose a Pallet Shed?
Before we dive into the exciting details, let's talk about why a pallet shed is such a fantastic project.Eco-Friendly and Budget-Friendly:
Repurposing pallets is incredibly environmentally friendly. You're giving these often-discarded materials a new lease on life, reducing waste and saving money in the process. The cost savings are significant â€" you'll be amazed at how much cheaper it is than buying pre-made shed components.
Unique and Customizable:
No two pallet sheds are exactly alike. The natural variations in the wood create a rustic charm that's hard to replicate. And, best of all, you can customize your shed to fit your specific needs and style. Want a charming cottage aesthetic? Go for it! Prefer a more modern, minimalist look? Absolutely! The possibilities are endless.
A Rewarding DIY Project:
Building your own pallet shed is a seriously rewarding experience. You'll get a fantastic sense of accomplishment, and you'll learn valuable DIY skills along the way. Plus, it’s a great weekend project to tackle with friends or family â€" turning it into a fun and memorable experience.
What You’ll Need Before You Start:
Before you jump into hammering and sawing, let's make sure you have everything you need. This isn't a comprehensive list (you'll find that in the downloadable plans!), but it covers the basics:- Reclaimed Pallets: The number will depend on the size of your shed. Make sure they are in decent condition and relatively clean.
- Measuring Tape and Level: Accuracy is key to a successful build!
- Safety Gear: Safety glasses, work gloves, and sturdy work boots are non-negotiable.
- Hand Tools: Hammer, crowbar (for separating pallets), screwdrivers, etc.
- Power Tools (Optional but Recommended): Circular saw, drill, impact driver will significantly speed up the process.
- Fasteners: Screws, nails, and possibly some strong wood glue.
- Wood Treatment (Optional): Consider treating the wood with a weather-resistant sealant to protect it from the elements.
- Roofing Material: Choose a material that suits your style and budget. Shingles, corrugated metal, or even tarps are options.
Building Your Pallet Shed: A Step-by-Step Overview
The downloadable plans provide detailed, step-by-step instructions, including diagrams and photos. However, here's a quick overview to get you excited:Step 1: Preparation and Planning
This is the most crucial step! Carefully review the plans, measure your chosen location, and gather all your materials. Make sure you have a level surface to build on.
Step 2: Foundation
You'll need a sturdy foundation for your shed. This could be as simple as a concrete slab or a well-prepared area of compacted gravel. The plans will guide you on the best foundation for your chosen shed size and location.
Step 3: Frame Construction
This is where the real fun begins! You'll be assembling the main frame of your shed using the reclaimed pallets. Pay close attention to the plans; accurate measurements are essential at this stage.
Step 4: Wall Construction
Once the frame is complete, you'll add the pallet walls. Again, careful attention to the plans is key to ensuring the walls are straight and secure.
Step 5: Roof Construction
Constructing the roof is a crucial step. You'll need to make sure it's strong enough to withstand the elements and properly angled to prevent water buildup. The plans will show you different roofing techniques.
Step 6: Finishing Touches
Once your shed is built, it's time to add the finishing touches! This might include adding a door, windows (if desired), painting, and weatherproofing. Let your creativity shine here!
Download Your Free PDF Plans Now!
Ready to turn your dream of a pallet shed into a reality? Simply [**click here**] (link to your PDF plans) to download your free PDF plans. These plans include detailed instructions, diagrams, and a comprehensive materials list. Happy building!
Frequently Asked Questions (FAQs)
Here are some questions I often get asked about building a pallet shed:
Q: Are all pallets suitable for building a shed?
A: No. Look for heat-treated pallets (marked with "HT" or "KD"). Avoid pallets marked with "MB" (methyl bromide treated) as they are chemically treated and pose a health risk.
Q: How long does it take to build a pallet shed?
A: The time required depends on the size and complexity of the shed, your experience level, and the number of people helping. Expect to spend several days, possibly a weekend or more.
Q: What kind of tools do I need?
A: The list of tools will vary depending on the shed's complexity, but at a minimum, you'll need measuring tools, safety gear, hammers, and possibly a saw. Power tools will significantly speed up the process.
Q: Do I need any special skills?
A: Basic DIY skills are helpful, but the step-by-step plans are designed to be easy to follow, even for beginners.
Q: How long will a pallet shed last?
A: With proper construction and weatherproofing, a well-built pallet shed can last for many years. Regular maintenance is key to extending its lifespan.
Remember, if you have more questions, don't hesitate to reach out! Happy building!
Wednesday, 20 November 2024
Lean-To Shed Build: A Practical Guide for Backyard Storage
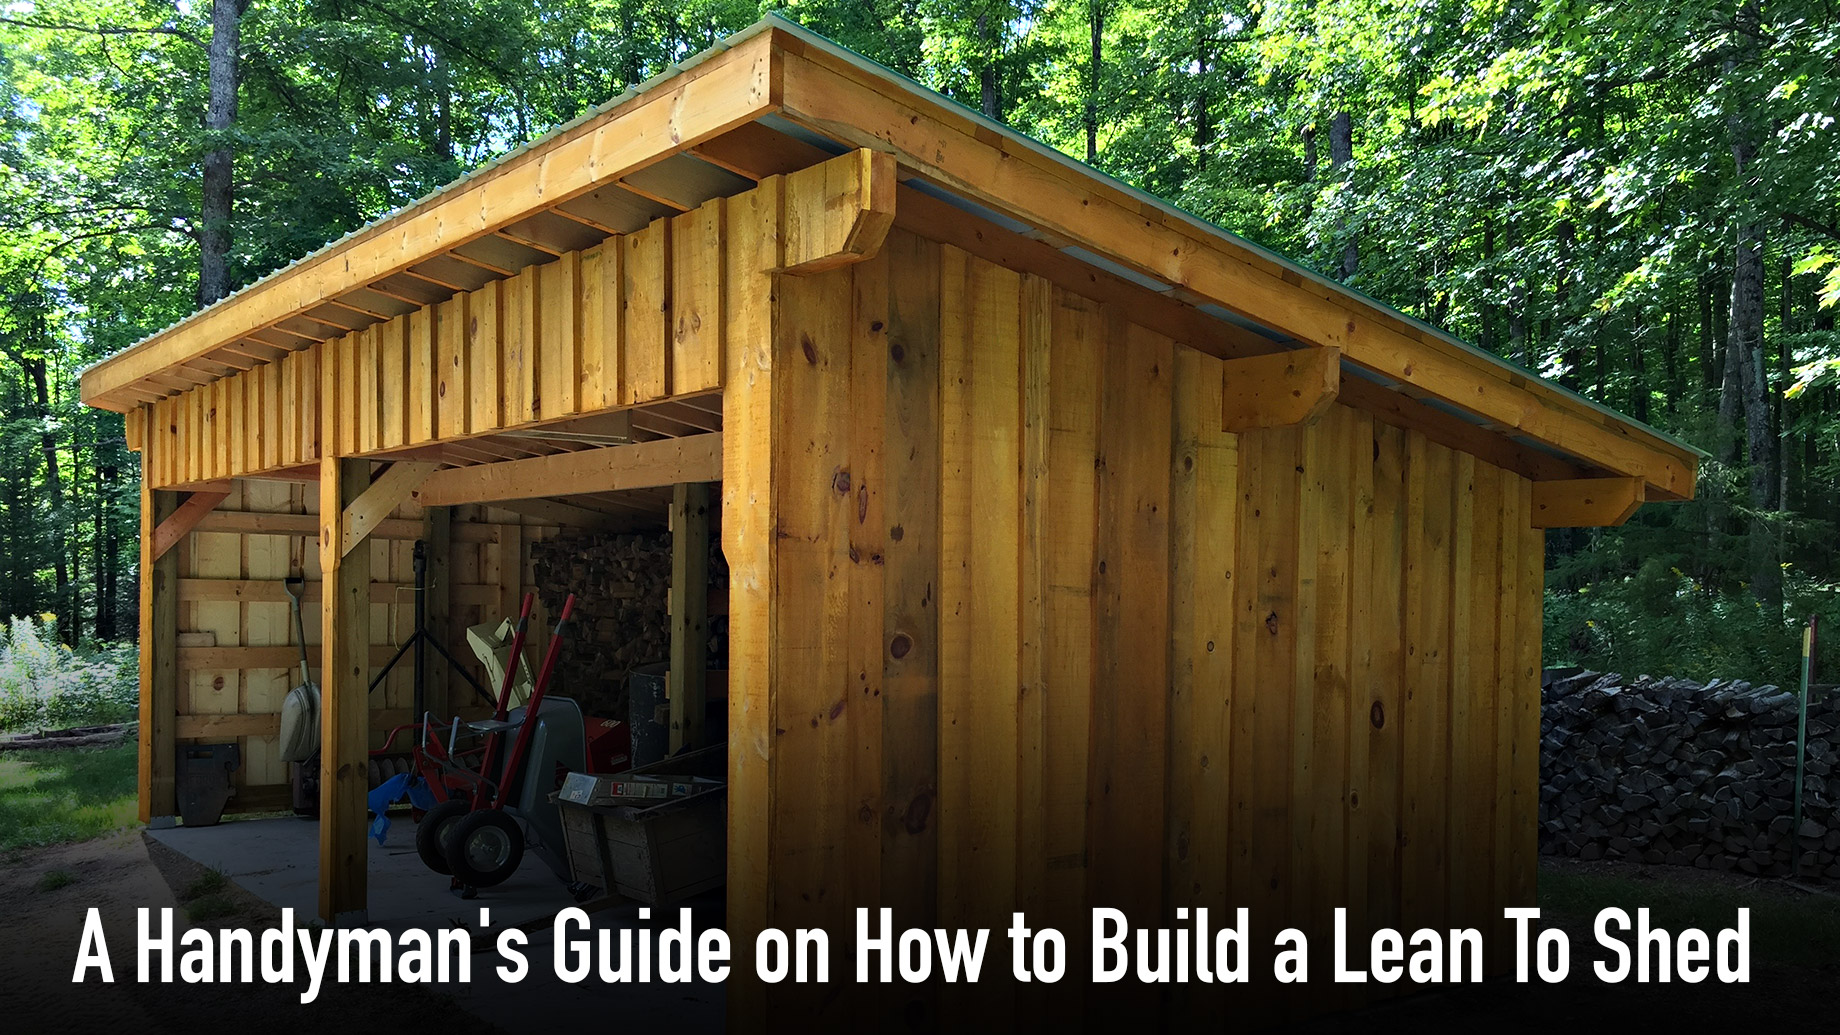
Lean-To Shed Build: A Practical Guide for Backyard Storage
The construction of a lean-to shed presents a compelling solution for homeowners seeking additional backyard storage without the significant undertaking of a freestanding structure. This guide provides a comprehensive overview of the lean-to shed building process, from initial planning and design considerations to the final stages of construction and finishing. Careful adherence to these steps will ensure a structurally sound and aesthetically pleasing addition to your property.
Phase 1: Planning and Design
Before commencing any construction, thorough planning is paramount. This phase involves crucial decisions that dictate the overall success and longevity of your lean-to shed.
Site Selection and Assessment
The chosen location should be level, easily accessible, and provide adequate space for construction and future usage. Consider proximity to existing structures, utilities (electrical, water), and drainage patterns. A thorough site assessment should include evaluating the soil conditions to determine the suitability for foundation construction. Soft or unstable soil may require additional groundwork, such as the installation of compacted gravel base.
Design Considerations: Size and Materials
The dimensions of your lean-to shed will be heavily influenced by your storage needs and the available space against the supporting structure (house, fence, or existing outbuilding). Accurate measurements are crucial to avoid material wastage and structural inconsistencies. Common lean-to shed sizes range from 6ft x 8ft to 10ft x 12ft, but larger structures are achievable depending on the supporting wall's strength and local building codes.
Material selection significantly impacts cost, durability, and aesthetics. Pressure-treated lumber is a popular choice for its resistance to rot and decay, providing a long lifespan even in damp climates. Other options include cedar or redwood for a more aesthetically pleasing (but often more costly) finish. Consider the roofing material as well: Asphalt shingles are economical and readily available, while metal roofing offers superior durability and longevity.
Permits and Regulations
Before initiating construction, it is essential to check with your local authorities regarding building permits and regulations. These requirements vary depending on location and the size of the structure. Failure to obtain necessary permits can result in fines or even demolition orders. Understanding zoning restrictions, setback requirements, and height limitations is crucial to ensure compliance.
Phase 2: Foundation and Framing
A stable foundation is the cornerstone of any successful building project. The specific foundation type will depend on the soil conditions and the size of the lean-to shed.
Foundation Construction
For smaller lean-to sheds on stable ground, a simple concrete slab foundation may suffice. Larger structures or those on less stable ground may require a more robust foundation, such as concrete piers or a gravel base. Ensure the foundation is perfectly level to prevent structural problems down the line. Accurate leveling is crucial for ensuring the shed's stability and preventing water accumulation.
Framing the Structure
The framing process begins with constructing the base frame, typically using pressure-treated lumber. The base frame should be securely attached to the supporting wall using appropriate fasteners, ensuring a strong and stable connection. Vertical wall studs are then erected and secured to the base frame, ensuring plumbness and squareness. Proper bracing is essential to maintain structural integrity during construction and prevent warping or sagging.
Roof rafters are then installed, ensuring proper spacing and slope for adequate water runoff. The roof's pitch should be sufficient to prevent water accumulation, typically a minimum of 4:12 (4 inches of rise for every 12 inches of run). The rafters should be securely attached to the wall studs and ridge board.
Phase 3: Roofing, Siding, and Finishing
Once the framing is complete, the focus shifts to the exterior finishes and the addition of any interior features.
Roofing Installation
Roofing installation involves laying underlayment (felt paper) over the rafters to provide a water barrier before applying the chosen roofing material. Follow the manufacturer's instructions for proper installation of asphalt shingles or metal roofing panels, ensuring overlapping for complete water protection. Proper flashing around chimneys, vents, and other penetrations is crucial to prevent leaks.
Siding and Trim
Siding provides both aesthetic appeal and protection from the elements. Common siding options include vinyl, wood, and metal. The chosen siding should be installed according to the manufacturer's instructions, ensuring proper overlapping and sealing to prevent water infiltration. Adding trim around windows, doors, and edges enhances the structure's appearance and protects the underlying structure.
Interior Finishing
The final stage involves the addition of interior features such as shelving, flooring, and lighting, tailored to the intended use of the lean-to shed. Consider adding shelving units for efficient storage, and a suitable floor covering to protect against moisture and damage. Adequate lighting is essential for safe and convenient use, especially during evening hours. If electrical work is involved, ensure that it is carried out by a qualified electrician.
Phase 4: Safety and Maintenance
Throughout the entire building process, safety should be paramount. Always wear appropriate personal protective equipment (PPE), including safety glasses, gloves, and hearing protection. Use caution when working with power tools and follow manufacturer's instructions. Regular inspections and maintenance are essential for the long-term durability of your lean-to shed. This includes checking for loose fasteners, damaged siding, and potential water leaks. Address any issues promptly to prevent more extensive damage and ensure the longevity of your structure.
In conclusion, constructing a lean-to shed is a rewarding project that provides valuable additional storage space. By carefully following this guide and adhering to safety guidelines, you can create a functional and aesthetically pleasing addition to your property.
Pallet Shed Plans PDF for DIY Enthusiasts on a Budget
Pallet Shed Plans PDF for DIY Enthusiasts on a Budget
Constructing a durable and functional shed can be a significant undertaking, often involving considerable expense. However, for the resourceful DIY enthusiast operating on a limited budget, repurposing reclaimed materials presents a compelling alternative. This article provides comprehensive guidance on creating detailed pallet shed plans in PDF format, allowing you to build your own storage solution while minimizing costs and maximizing sustainability.
Assessing Your Needs and Site Preparation
Before embarking on the design phase, a thorough assessment of your requirements and site conditions is paramount. This crucial initial step lays the foundation for a successful project.
Defining Shed Dimensions and Functionality
Consider the intended purpose of your shed. Will it primarily serve as a storage space for gardening tools and equipment, or will it accommodate larger items such as bicycles or lawnmowers? The dimensions of your shed should directly reflect its intended function. Sketching preliminary designs, even rudimentary ones, can be invaluable in visualizing the final product and identifying potential space constraints.
Determine the necessary dimensions â€" length, width, and height â€" to ensure adequate internal space. Remember to factor in the thickness of the pallet wood and the desired internal clearances. Overestimating space is generally preferable to underestimating, as it allows for greater flexibility and future expansion possibilities.
Site Selection and Ground Preparation
The chosen location should be level, well-drained, and accessible. Avoid areas prone to flooding or excessive shade. Assess the surrounding environment for potential obstructions, such as trees or utility lines. Ensure that the chosen site complies with any relevant building codes or regulations.
Proper ground preparation is crucial for a stable and long-lasting structure. Level the ground using a shovel and rake, removing any debris or vegetation. A compacted gravel base will provide improved drainage and enhance the shed's stability. Consider installing concrete piers or a more substantial foundation, depending on your shed's size and the soil conditions.
Designing Your Pallet Shed: Creating the PDF Plans
The creation of detailed PDF plans is a critical step in the construction process. These plans serve as a roadmap, guiding you through each stage of the build and minimizing the risk of errors.
Software Options for Plan Creation
Several software options are available for creating professional-looking plans. Free and open-source programs like LibreOffice Draw or Google Drawings offer basic functionality, suitable for simpler shed designs. More advanced software, such as SketchUp or AutoCAD, provides greater precision and detail but may require a learning curve.
Regardless of the software you choose, your plans should include:
- Detailed dimensions: Length, width, height, and internal measurements of all components.
- Material list: A comprehensive list of all required materials, including the number of pallets, fasteners, and additional lumber.
- Assembly instructions: Clear, step-by-step instructions with accompanying diagrams or illustrations.
- Foundation plan: Specifications for the shed's foundation, whether it's a gravel base, concrete piers, or a more substantial foundation.
- Framing plan: Detailed diagrams illustrating the construction of the shed's frame, including wall framing, roof framing, and door/window placement.
- Roofing plan: Specifications for the roofing materials and the method of installation.
- Cladding plan: Details on how the pallet wood will be installed to form the shed's walls and roof.
Essential Considerations in Your Design
When designing your pallet shed, consider these key aspects:
- Pallet Condition: Inspect pallets carefully before using them. Select pallets that are free of significant damage, rot, or pest infestation. Repair any minor damage before incorporating them into the shed's structure.
- Pallet Orientation: Decide whether to use pallets vertically or horizontally in the construction. Vertical orientation offers greater stability, while horizontal orientation may simplify the assembly process.
- Structural Integrity: Ensure that the shed's frame provides sufficient structural support to withstand anticipated loads and weather conditions. Proper bracing and reinforcement are essential for stability.
- Door and Window Placement: Strategically place doors and windows to maximize natural light and ventilation while maintaining structural integrity.
- Roof Design: Choose a roof design that suits your climate and aesthetic preferences. A simple gable roof is often the most straightforward option.
- Weatherproofing: Plan for appropriate weatherproofing measures, such as using a waterproof sealant or roofing felt to protect the shed from moisture damage.
Building Your Pallet Shed: A Step-by-Step Guide
Once your detailed PDF plans are finalized, you can begin the construction process. Follow these general steps, always referring to your specific plans for precise instructions:
- Foundation Preparation: Prepare the ground according to your plans, ensuring a level and stable base.
- Frame Construction: Construct the shed's frame using appropriately sized lumber, following the dimensions and specifications outlined in your plans.
- Pallet Installation: Begin attaching the pallets to the frame, ensuring proper alignment and secure fastening. Use appropriate screws or nails to secure the pallets.
- Roof Construction: Construct and install the roof according to your plans. Apply roofing felt or other weatherproofing materials to protect the shed from the elements.
- Door and Window Installation: Install the doors and windows, ensuring a secure and weathertight seal.
- Finishing Touches: Apply any necessary finishing touches, such as painting or staining, to protect the wood and enhance the shed's appearance.
Cost Savings and Sustainability
Building a pallet shed offers significant cost advantages compared to traditional shed construction. The primary cost savings stem from the use of reclaimed pallets, reducing or eliminating the need for purchasing new lumber. Furthermore, the construction process can often be undertaken with readily available tools, minimizing rental costs.
The project also promotes sustainability by repurposing discarded materials, reducing waste and environmental impact. This eco-conscious approach contributes to responsible resource management and minimizes the project’s carbon footprint.
Conclusion
Constructing a pallet shed is a rewarding DIY project that combines cost-effectiveness with sustainability. By meticulously following detailed PDF plans and adhering to best practices, you can create a functional and aesthetically pleasing storage solution that enhances your property while minimizing your environmental impact and maximizing your budget. Remember that thorough planning and preparation are crucial for a successful outcome.
How to Build an Affordable 8x12 Shed with Porch for Your Backyard

Constructing an Affordable 8x12 Shed with Porch: A Comprehensive Guide
The desire for additional storage space or a tranquil outdoor retreat often leads homeowners to consider building a shed. An 8x12 shed, complemented by a porch, offers a versatile solution, providing ample storage while creating a charming addition to any backyard. This guide details the process of constructing such a structure affordably, emphasizing cost-effective materials and efficient construction techniques. Careful planning and execution are paramount to achieving a sturdy, aesthetically pleasing, and budget-friendly result.
Phase 1: Planning and Design
Before commencing construction, meticulous planning is essential. This phase involves defining the shed's purpose, selecting appropriate materials, obtaining necessary permits, and finalizing the design.
Defining Purpose and Functionality
The intended use of the shed dictates its internal layout and required features. Will it primarily serve as storage for gardening tools and equipment, a workshop, or a combination of both? Consider incorporating shelving, workbenches, or electrical outlets based on your needs. The porch's purpose should also be defined â€" a simple seating area, a covered entryway, or a more elaborate space for relaxing and enjoying the outdoors.
Material Selection for Cost-Effectiveness
Opting for cost-effective materials without compromising structural integrity is crucial for an affordable build. Pressure-treated lumber is a durable and affordable choice for the shed's framing. For the siding, consider using less expensive options like vinyl or composite panels, which require minimal maintenance. The roofing material should be selected based on local climate and budget, with options ranging from asphalt shingles to metal roofing.
Consider these cost-saving strategies:
- Source materials from local lumber yards or salvage yards for potential discounts.
- Purchase materials in bulk to take advantage of volume discounts.
- Repurpose or recycle existing materials whenever feasible.
Obtaining Necessary Permits
Contact your local building department to ascertain the necessary permits and building codes applicable to your area. Failure to obtain the required permits can result in significant fines and potential demolition orders. The permit application process typically involves submitting detailed plans, specifications, and potentially undergoing inspections during different stages of construction.
Finalizing the Design and Drawings
Develop detailed plans, including accurate measurements and specifications for all components. These plans should include the shed's overall dimensions (8x12), the porch dimensions, roof pitch, door and window placements, and the type of foundation to be used. Consider using free online shed design tools or consulting with a professional for assistance in creating comprehensive plans. Detailed drawings will streamline the construction process and minimize errors.
Phase 2: Foundation and Framing
A sturdy foundation is paramount for a long-lasting shed. The framing process establishes the structure's skeletal framework, requiring precise measurements and careful assembly.
Foundation Construction
Several foundation options exist, each with varying costs and levels of complexity. A concrete slab provides the most stable foundation but is also the most expensive. A more affordable alternative is a gravel base, followed by a pressure-treated lumber base. Ensure the foundation is level and adequately sized to support the shed's weight, including the anticipated load from stored items.
Framing the Shed Walls and Roof
Framing involves constructing the walls and roof using pressure-treated lumber. Begin by constructing the wall frames, ensuring they are square and plumb. Then, erect the wall frames onto the foundation, securing them with appropriate fasteners. The roof framing involves constructing the rafters and trusses, ensuring proper spacing and pitch. Consider using pre-fabricated trusses to simplify the construction and reduce costs. Accurate cuts and precise measurements are crucial for a strong and stable structure.
Phase 3: Exterior Cladding, Roofing, and Porch Construction
This phase involves applying the exterior cladding, installing the roofing material, and constructing the porch.
Installing Exterior Cladding
Apply the chosen siding material â€" vinyl, composite, or wood â€" to the exterior walls. Ensure proper overlap and alignment for a neat and professional finish. Consider using weatherproof sealant around windows and doors to prevent water damage. Pay close attention to detail, ensuring all panels are securely fastened and aligned correctly.
Roofing Installation
Install the chosen roofing material according to the manufacturer's instructions. Proper underlayment is essential for preventing leaks. Ensure the roofing material is securely fastened and that the roofline is straight and aesthetically pleasing. A properly installed roof is crucial for protecting the shed from the elements.
Constructing the Porch
The porch can be a simple structure, often consisting of a concrete or gravel base, pressure-treated lumber framing, and decking. Ensure the porch's framing is securely connected to the shed's main structure for stability. The decking material can be chosen based on budget and aesthetic preferences. Consider adding railings for safety and a decorative touch.
Phase 4: Finishing Touches and Inspections
The final phase involves adding the finishing touches and ensuring compliance with building codes through inspections.
Installing Doors and Windows
Install the shed's doors and windows, ensuring a tight seal to prevent drafts and water infiltration. Use appropriate hardware and weather stripping for a secure and weather-resistant fit.
Interior Finishing
This stage may involve painting or staining the interior walls, installing shelving, and adding electrical wiring (if required and permitted). Complete any necessary interior finishing to achieve the desired functionality.
Final Inspections
Schedule a final inspection with your local building department to ensure compliance with all relevant building codes. Address any issues identified during the inspection before obtaining final approval.
Building an 8x12 shed with a porch requires time, effort, and attention to detail. By carefully planning, selecting cost-effective materials, and executing the construction process efficiently, you can create a valuable addition to your backyard while staying within your budget. Remember to always prioritize safety and follow building codes throughout the construction process.