Thursday, 21 November 2024
How to Make a Strong and Reliable DIY Pallet Shed: Step-by-Step Guide

Building a Strong and Reliable DIY Pallet Shed: A Step-by-Step Guide
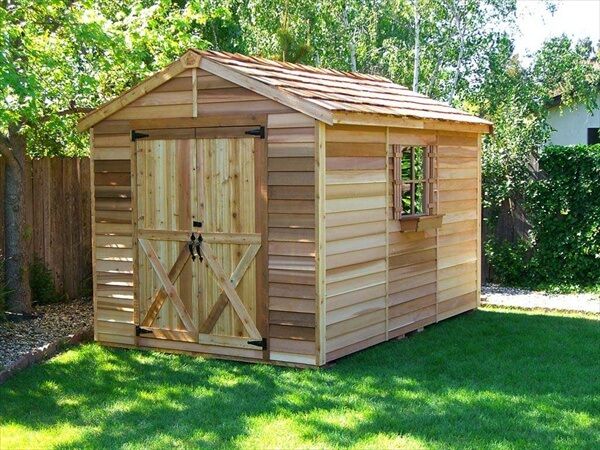
Transform discarded pallets into a sturdy and functional shed with this comprehensive guide. We'll walk you through each stage, ensuring your new storage solution is both robust and aesthetically pleasing. Forget flimsy structures; this guide empowers you to build a shed that will stand the test of time and weather.
1. Planning and Preparation: Laying the Foundation for Success
Before you even touch a pallet, meticulous planning is key. Start by determining the desired dimensions of your shed. Consider the space available and the items you plan to store. Sketch a simple design, noting the placement of doors, windows (if desired), and any internal shelving. Next, gather your materials. This includes a sufficient quantity of reclaimed pallets â€" inspect each carefully for rot, damage, and loose nails; you need sturdy ones for a robust build. You’ll also need: strong screws (consider exterior-grade galvanized screws for longevity), pressure-treated lumber for the base and supports (if needed), roofing materials (metal, asphalt shingles, or corrugated plastic), and any desired hardware like hinges, handles, and locks. Don’t forget safety gear â€" work gloves, safety glasses, and a sturdy work apron are essential.
Choosing the Right Pallets
Not all pallets are created equal. Look for pallets made of sturdy hardwood, avoiding those with significant damage or signs of pest infestation. Heat-treated pallets are preferable to chemically treated ones, ensuring safety and longevity. The more uniform your pallets are in size and condition, the easier the construction process will be.
2. Building the Foundation: A Stable Base for Your Shed
A solid foundation is paramount for a long-lasting shed. Begin by leveling the ground where your shed will stand. Use a shovel and level to create a flat, even surface. You can opt for a simple gravel base for drainage, or for a more permanent solution, lay down a concrete slab or a sturdy wooden frame supported by pressure-treated lumber footings. This base will prevent settling and protect your shed’s structure from ground moisture. Once your base is secure, you can start assembling the pallet walls.
3. Constructing the Walls: Assembling the Pallet Framework
Carefully dismantle the selected pallets, removing any loose or damaged boards. Clean the remaining boards thoroughly, removing any debris or loose nails. Now, begin constructing the walls using the reclaimed boards. You can create a frame using the stronger pallet beams and then fill in the gaps with the remaining boards. Ensure the boards are securely fastened with screws, paying close attention to alignment and stability. Construct each wall separately, ensuring they are all the same height and width before moving to the next step. For added strength, consider using additional pressure-treated lumber for vertical supports inside the pallet walls.
Securing the Walls
Once your walls are constructed, stand them upright and secure them together using strong bracing and additional screws. Ensure the corners are square and the walls are plumb (perfectly vertical). Consider using long screws to penetrate deep into the pallet wood, maximizing the strength of the joints. A well-secured framework is the cornerstone of a resilient shed.
4. Adding the Roof: Protecting Your Investment from the Elements
Construct a roof frame using pressure-treated lumber, ensuring it's strong enough to support your chosen roofing material. The roof design can be simple â€" a gable roof is both practical and visually appealing. Attach the roof frame securely to the top of your pallet walls using more screws. Then, carefully install your roofing material, following the manufacturer’s instructions. Whether you choose metal sheeting, asphalt shingles, or corrugated plastic, ensure a waterproof seal to protect your belongings from rain and snow.
5. Finishing Touches: Adding Doors, Windows, and Final Details
Install a door using pressure-treated lumber and hinges. Ensure the door fits snugly and closes securely. You can add windows for natural light and ventilation, using plexiglass or similar transparent material. Finish the interior with shelving made from additional pallets or lumber, optimizing storage space. Apply a protective exterior sealant to all wooden surfaces to increase weather resistance and longevity. Finally, consider adding a coat of paint or stain to enhance the aesthetics of your pallet shed.
Congratulations! You’ve successfully built a robust and reliable DIY pallet shed. This guide provides a solid foundation for your project. Remember, careful planning and meticulous execution are key to achieving a durable and attractive structure that will serve you well for years to come.
No comments:
Post a Comment